2018년 12월 22일 토요일

18.04 에 mysql 설치하기

1. mysql 설치

  > sudo apt update
  > sudo apt install mysql-server

2. mysql 설정하기

  > sudo mysql_secure_installation

Securing the MySQL server deployment.Connecting to MySQL using a blank password.The 'validate_password' plugin is installed on the server.The subsequent steps will run with the existing configurationof the plugin.Please set the password for root here.New password: Re-enter new password: Estimated strength of the password: 50 Do you wish to continue with the password provided?(Press y|Y for Yes, any other key for No) : yBy default, a MySQL installation has an anonymous user,allowing anyone to log into MySQL without having to havea user account created for them. This is intended only fortesting, and to make the installation go a bit smoother.You should remove them before moving into a productionenvironment.Remove anonymous users? (Press y|Y for Yes, any other key for No) : n ... skipping.Normally, root should only be allowed to connect from'localhost'. This ensures that someone cannot guess atthe root password from the network.Disallow root login remotely? (Press y|Y for Yes, any other key for No) : ySuccess.By default, MySQL comes with a database named 'test' thatanyone can access. This is also intended only for testing,and should be removed before moving into a productionenvironment.Remove test database and access to it? (Press y|Y for Yes, any other key for No) : n ... skipping.Reloading the privilege tables will ensure that all changesmade so far will take effect immediately.Reload privilege tables now? (Press y|Y for Yes, any other key for No) : ySuccess.All done!


2. mysql 로그인 하기

  > sudo mysql -u root

Welcome to the MySQL monitor. Commands end with ; or \g.Your MySQL connection id is 9Server version: 5.7.24-0ubuntu0.18.04.1 (Ubuntu)Copyright (c) 2000, 2018, Oracle and/or its affiliates. All rights reserved.Oracle is a registered trademark of Oracle Corporation and/or itsaffiliates. Other names may be trademarks of their respectiveowners.Type 'help;' or '\h' for help. Type '\c' to clear the current input statement.mysql>


3. Database 생성

  mysql> create database lora_db;

mysql> show databases;+--------------------+| Database |+--------------------+| information_schema || mysql || performance_schema || sys |+--------------------+4 rows in set (0.00 sec)mysql> create database lora_db;Query OK, 1 row affected (0.00 sec)mysql> show databases;+--------------------+| Database |+--------------------+| information_schema || lora_db || mysql || performance_schema || sys |+--------------------+5 rows in set (0.00 sec)mysql>

4. Table 생성


   mysql> use lora_db;
   mysql> create table ..... ;

mysql> use lora_db;Database changedmysql> show tables;Empty set (0.00 sec)mysql> drop table if exists GROUP_INFO;Query OK, 0 rows affected, 1 warning (0.00 sec)mysql> create table GROUP_INFO( -> SEQ bigint not null, -> NAME varchar(32), -> ICON varchar(32), -> primary key(SEQ) -> );Query OK, 0 rows affected (0.08 sec)mysql> show tables;+-------------------+| Tables_in_lora_db |+-------------------+| GROUP_INFO |+-------------------+1 row in set (0.00 sec)mysql>


5. 사용자 등록 및 권한부여

   mysql> create user 'lora'@'localhost' identified by '1234';
   mysql> grant all privileges on lora_db.* to 'lora'@'localhost';

mysql> uninstall plugin validate_password;Query OK, 0 rows affected (0.07 sec)mysql> create user 'lora'@'localhost' identified by '1234';Query OK, 0 rows affected (0.00 sec)mysql> grant all privileges on lora_db.* to 'lora'@'localhost';Query OK, 0 rows affected (0.00 sec)

6. Password 정책 해제방법
   
   mysql> uninstall plugin validate_password;


2018년 10월 18일 목요일

NodeJS+FileServer+Angular+ChartJS 로 개발하기

0) Node 설치
  > curl -sL https://deb.nodesource.com/setup_11.x | sudo -E bash -
  > sudo apt-get install nodejs
  > sudo apt-get install npm

1) Node 를 최신버젼으로 업그레이드 한다.
  > sudo npm install -g n
  > sudo n stable

2) Angular CLI 를 설치한다.
  > sudo npm install -g @angular/cli

3) 프로젝트 폴더 생성
  > ng new U2ReportServer

4) 프로젝트 폴더로 진입
  > cd U2ReportServer

5) express , multer , cors 모듈 추가
  > npm install express multer cors chart.js --save

6) 생성된 package.json 파일을 확인한다.
----------------------------------------------------------
{
  "name": "u2-report-server",
  "version": "1.0.0",
  "scripts": {
    "ng": "ng",
    "start": "ng serve",
    "build": "ng build",
    "test": "ng test",
    "lint": "ng lint",
    "e2e": "ng e2e"
  },
  "private": true,
  "dependencies": {
    "@angular/animations": "^6.1.0",
    "@angular/common": "^6.1.0",
    "@angular/compiler": "^6.1.0",
    "@angular/core": "^6.1.0",
    "@angular/forms": "^6.1.0",
    "@angular/http": "^6.1.0",
    "@angular/platform-browser": "^6.1.0",
    "@angular/platform-browser-dynamic": "^6.1.0",
    "@angular/router": "^6.1.0",
    "chart.js": "^2.7.3",
    "core-js": "^2.5.4",
    "cors": "^2.8.4",
    "express": "^4.16.4",
    "multer": "^1.4.1",
    "rxjs": "~6.2.0",
    "zone.js": "~0.8.26"
  },
  "devDependencies": {
    "@angular-devkit/build-angular": "~0.8.0",
    "@angular/cli": "~6.2.4",
    "@angular/compiler-cli": "^6.1.0",
    "@angular/language-service": "^6.1.0",
    "@types/jasmine": "~2.8.8",
    "@types/jasminewd2": "~2.0.3",
    "@types/node": "~8.9.4",
    "codelyzer": "~4.3.0",
    "jasmine-core": "~2.99.1",
    "jasmine-spec-reporter": "~4.2.1",
    "karma": "~3.0.0",
    "karma-chrome-launcher": "~2.2.0",
    "karma-coverage-istanbul-reporter": "~2.0.1",
    "karma-jasmine": "~1.1.2",
    "karma-jasmine-html-reporter": "^0.2.2",
    "protractor": "~5.4.0",
    "ts-node": "~7.0.0",
    "tslint": "~5.11.0",
    "typescript": "~2.9.2"
  }
}
----------------------------------------------------------

7) ./backend/config/multer.config.js 파일을 생성한다.
----------------------------------------------------------
const multer = require('multer');

var storage = multer.diskStorage({
destination: (req, file, cb) => {
  cb(null, __basedir + '/uploads/')
},
filename: (req, file, cb) => {
  cb(null, file.originalname)
}
});

var upload = multer({storage: storage});

module.exports = upload;
----------------------------------------------------------

8) ./backend/routers/file.router.js 파일을 생성한다.
----------------------------------------------------------
let express = require('express');
let router = express.Router();
let upload = require('../config/multer.config.js');

let fileWorker = require('../controllers/file.controller.js');

router.post('/api/file/upload', upload.single("file"), fileWorker.uploadFile);
router.get('/api/file/all', fileWorker.listUrlFiles);
router.get('/api/file/:filename', fileWorker.downloadFile);

module.exports = router;
----------------------------------------------------------

9) ./backend/controllers/file.controller.js 파일을 생성한다.
----------------------------------------------------------
const uploadFolder = __basedir + '/uploads/';
const fs = require('fs');

exports.uploadFile = (req, res) => {
res.send('File uploaded successfully! -> filename = ' + req.file.filename);
}

exports.listUrlFiles = (req, res) => {
fs.readdir(uploadFolder, (err, files) => {
for (let i = 0; i < files.length; ++i) {
files[i] = "http://localhost:8080/api/file/" + files[i];
}

res.send(files);
})
}

exports.downloadFile = (req, res) => {
let filename = req.params.filename;
res.download(uploadFolder + filename);
}
----------------------------------------------------------

10) ./server.js 파일을 생성한다. (main 파일임)
----------------------------------------------------------
var express = require('express');
var app = express();

const bodyParser = require('body-parser');
const path = require('path');
const cors = require('cors')
const corsOptions = {
    origin: 'http://localhost:4200',
    optionsSuccessStatus: 200
}
app.use(cors(corsOptions));

global.__basedir = __dirname;

let router = require('./backend/routers/file.router.js');

// Parsers
app.use(bodyParser.json());
app.use(bodyParser.urlencoded({ extended: false }));

// Angular DIST output folder
app.use(express.static(path.join(__dirname, 'public')));

// API location
app.use('/api', router);

// Send all other requests to the Angular app
app.get('*', (req, res) => {
  console.log("angular path");
  res.sendFile(path.join(__dirname, 'public/index.html'));
});

// Create a Server
let server = app.listen(8082, () => {

    let host = server.address().address
    let port = server.address().port

    console.log("App listening at http://%s:%s", host, port);
})
------------------------------------------------------------

11) angular.json 파일의 outputPath 를 public 으로 바꾼다.
----------------------------------------------------------
          "options": {
            "outputPath": "public",
            "index": "src/index.html",
----------------------------------------------------------

12) Angular 를 build 한다.
  > ng build

13) Server 를 실행한다.
  > node server.js


2018년 10월 10일 수요일

2018년 10월 7일 일요일

TypeScript 로 개발하기

1) TypeScript 설치
  > npm install -g typescript

  -g 옵션을 주면 global 어디서나 TypeScript 를 사용할 수 있다.
  -g 옵션을 주지 않으면 실행한 folder 에서만 TypeScript 를 사용한다.


2) 테스트용 파일 생성
   index.html
     <html>
       <head lang="ko">
         <title>
            type script test
         </title>
         <meta charset="utf-8" />
         <script src="index.js"></script>
      </head>
      <body>
        <p>type script test on browser environments</p>
      </body>
    </html>

   index.ts
    console.log("type script test on console environments");

3) TypeScript 를 compile
  > tsc index.ts

  TypeScrpt 파일을 compile 하면 js 파일이 생성된다.
  위의 경우 index.js 파일이 생성된다.

4) 생성된 index.js 를 실행해 본다.
  > node index.js
 
5) npm 환경 구성
  > npm init

6) test 를 위한 lite-server 설치
  > npm install lite-server --save-dev

7) lite-server 실행 스크립트 추가
  package.json 에 "start" 라는 명령어를 추가한다.

    "scripts": {
       "test": "echo \"Error: no test specified\" && exit 1",
       "start": "lite-server"
    },

8) lite-server 를 실행한다.
  > npm start

9) TypeScript 컴파일 환경을 설정한다.
  > tsc --init

10) TypeScript 파일 모두 compile 하기
  > tsc

  tsc --init 를 실행하고 나면 tsc 명령으로 모든 ts 파일을 compile 하여 js 파일을 만든다.


2018년 9월 10일 월요일

cordova custom plugin 개발하기

* Plugin 개발
---------------------------------------------------------------------------------------------------
1) Plugin Manager 를 설치한다.
   > npm install -g plugman

2) Cordova 프로젝트 생성
   > cordova create pluginTestApp com.test.plugin PTA


3) Custom Plugin 을 생성한다.
   > plugman create --name myPlugin --plugin_id com.test.myplugin --plugin_version "0.0.1"
   > myPlugin 폴더가 생성된 것을 확인할 수 있다.


4) Android 용 plugin 템플릿을 생성한다.
   > cd myPlugin
   > plugman platform add --platform_name android


* 참조 blog
https://henotia.github.io/MakeCordovaPlugin-1/
https://henotia.github.io/MakeCordovaPlugin-2/


* Custom Plugin 설치
---------------------------------------------------------------------------------------------------
1) Project 폴더에 Custom 플러그인을 위치시킨다.
   > cd myPlugin
   > dir

2018-09-14  오후 03:07    <DIR>          .
2018-09-14  오후 03:07    <DIR>          ..
2018-09-08  오전 12:48               363 .editorconfig
2018-09-08  오전 12:48               439 .gitignore
2018-09-14  오후 02:54    <DIR>          .sourcemaps
2018-09-14  오후 03:07             6,338 config.xml
2018-09-14  오후 03:06    <DIR>          TestCustomPlugin
2018-09-14  오후 02:48                93 ionic.config.json
2018-09-14  오후 03:07    <DIR>          node_modules
2018-09-14  오후 03:07           244,029 package-lock.json
2018-09-14  오후 03:07             1,834 package.json
2018-09-14  오후 03:00    <DIR>          platforms
2018-09-14  오후 03:07    <DIR>          plugins
2018-09-14  오후 03:04    <DIR>          resources
2018-09-14  오후 02:47    <DIR>          src
2018-09-08  오전 12:48               519 tsconfig.json
2018-09-08  오전 12:48               178 tslint.json
2018-09-14  오후 02:53    <DIR>          www
               8개 파일             253,793 바이트
              10개 디렉터리  150,516,252,672 바이트 남음

2) custom plugin 을 설치한다.
   > ionic cordova plugin add [경로] --save
   > ionic cordova plugin add TestCustomPlugin --save

2018년 8월 30일 목요일

ionic framework 으로 개발하기

1) ionic 과 cordova 설치
    > npm install -g ionic cordova

2) ionic 프로젝트 생성
    > ionic start TestApp

3) Platform 추가하기
    > ionic cordova platform add android
    > ionic cordova platform add ios

4) android 로 build
    > ionic cordova build android

5) Android Studio 를 실행하고  Import Project 를 선택한 후 platform/android 폴더를 선택하여 Project 를 loading 한다.


6) Web Browser 에서 화면 테스트하기

   > ionic serve
   
      안드로이드/아이폰 형태로 보고싶으면...
   > ionic serve --lab

7) 화면 수정후 prepare 를 해야 android 에 반영됨. 왜냐하면 ionic 은 화면 loading 속도를 빠르게하기 위해서 여러페이지를 build 를 통해 하나의 페이지로 만든다.

   > ionic cordova prepare android

8) 배포용 build 하기

   > Android Studio 에서 아래 메뉴를 사용하여 signed apk 를 생성한다.


8) ios 의 경우 emulator 에서 테스트하기

   > ionic cordova build ios
   > ionic cordova emulate ios

2018년 7월 18일 수요일

무채색


성장이 없는 삶은 무채색 그림이다.

우리의 삶은 도화지에 그림을 그리는 것과 같다.
꿈이라는 밑그림을 그리고
매일 조금씩 성장으로 채색해 나가야 한다.

가끔 어울리지 않는 색을 칠하기도 하지만
그런 건 새로운 색으로 덧칠하면 그뿐이다.
화려한 색깔의 작품이 완성될 때까지
우리는 열심히 채색해야 한다.

만약 우리가 도화지에 밑그림도 그리지 않고 채색을 한다면
색깔은 방향을 잃을 것이다.
만약 우리가 밑그림은 그렸어도 채색을 하지 않는다면
공허한 그림이 될 것이다.

성장이 없는 삶은 무채색의 공허한 삶이 될 것이다.


나에게는 늘 되고 싶은 모습이 있다.


나는 늘 사랑하는 사람으로서 나를 아는 모든 이들을 이해하고 배려하려 노력할 것이다.

나는 늘 자유로운 사람으로서 남이 아닌 나를 기준으로 세상을 바라볼 것이다.

나는 늘 행복한 사람으로서 나에게 주어진 모든 것에 감사하며 살아갈 것이다.

나는 늘 꿈꾸는 사람으로서 현실과 이상을 구분할 수 있는 혜안을 가질 것이다.

나는 늘 열정적인 사람으로서 아침에 눈뜨면 셀렘으로 가슴뛰는 나를 느낄 것이다.

나는 늘 긍정적인 사람으로서 내 주변의 기회를 찾고 잡을 수 있는 열린 마음을 가질 것이다.

나는 늘 준비하는 사람으로서 반드시 다가올 미래를 위해 시간을 저축할 것이다.

나는 늘 깨어있는 사람으로서 세상의 변화를 읽고 대응할 수 있는 시나리오를 만들 것이다.

나는 늘 가정적인 사람으로서 모든 결정과 판단의 우선순위에 가족이 있을 것이다.

나는 늘 공감하는 사람으로서 다른 이들의 얘기를 경청하고 공감을 표현할 것이다.

나는 늘 근면한 사람으로서 나에게 주어진 일에 몰입하여 공익적 가치를 만들어 낼 것이다.

나는 늘 실천하는 사람으로서 결단을 내린 일은 반드시 실천할 것이다.

나는 늘 배우는 사람으로서 나의 부족함을 인정하고 모든 것을 겸손하게 받아들일 것이다.

나는 늘 성장하는 사람으로서 어제와 다른 오늘을 살아갈 것이다.


나는 늘 되고 싶은 모습이 있고 늘 그렇게 되려고 노력한다.

다음


항상 우리에겐 다음이 있다.

기회는 이미 지나가고 나서야 알 수가 있다.
지나간 기회는 아무리 잡으려 해도 잡을 수가 없다.
지나간 기회에 안타까워하지 마라!
새로운 기회가 다시 또 찾아올 것이다.
지나간 기회에 얽매여 시간을 낭비하는 사이에
새로운 기회마저 놓치게 된다.

항상 우리에겐 다음이 있지만
그 다음이란 기한이 있다는 것을 잊어서는 안된다.

비웃음


누구든 비웃음을 보낼 자격은 없다.

소위 전문가라 불리는 사람 중에는
아이디어를 비웃음으로 평가하는 사람들이 있다.
하지만 어떤 아이디어도 비웃음의 대상이 되어서는 안된다.
비웃음을 보내는 사람들은 자신의 아이디어도 비웃음이 될까 봐
시도조차 못하는 사람들이다.

아이디어를 만드는 사람들은 비웃음을 무시할 신념만이 필요하다.

어느새


어느새 나이가 들어버렸다.

열심히 살았는데
열심히 살면 모든 것이 잘 될 줄 알았는데
열심히 살면서 행복을 꿈꿨는데

어느새 나이가 들어버렸다.

현명하게 생활하지 못해 병들었고
현명하게 준비하지 못해 실패했고
현명하게 살지 못해 후회한다.

어느새 나이 말곤 남은 게 없다.

부딪히다


무슨 일이건 부딪히고 볼 일이다.

새로운 일을 시작할 때
너무 많은 걱정으로 너무 많은 준비를 하는 것은 비효율적이다.
그렇게 걱정했던 문제는 발생하지 않고
그렇게 준비한 것은 써먹지 못한다.

새로운 일에 확신이 있다면 70%가 준비되면 시작해라!
준비한 70% 중 50%는 써먹을 수 있을 것이다.
나머지 50%는 전혀 생각하지 못한 문제들을 만나게 될 것이다.

그래서 무슨 일이건 부딪히고 볼 일이다.

2018년 5월 15일 화요일

첫날

우리의 아침은 항상 첫날이다.

우리가 매일 똑같은 시간에 일어나더라도
어제보다 조금 더 성장한 내가 그 아침을 맡는다면
내가 맞이한 그 아침은 항상 첫날이다.

우리가 매일매일 조금씩 성장한다면
우리는 매일매일 첫날의 설렘을 맛볼 수 있다.

그래서 우리의 아침은 항상 첫날이다.

점수

우리는 자신에게 최고의 점수를 부여해야 한다.

우리는 많은 역할을 수행하고 있다.
아빠, 아들, 선배, 상사, 친구, 동생 등등등...
이 역할 각각에 점수를 매겨보자. 10점 만점이다.
당신이 매긴 점수는
당신이 그 역할을 소중하게 생각하는 척도이다.

그런데 만약 우리가 자신에게 8점을 부여한다면
나머지 역할을 절대 8점을 넘을 수 없을 것이다.
그러므로 나 스스로에게 10점을 부여하여야 한다.
그래야 나머지 역할에게도 좋은 점수를 줄 여지가 생긴다.

자존감을 가져라!
그리고 자신에게 최고의 점수를 매겨라!
그러면 다른 역할에도 좋은 점수를 부여할 수 있을 것이다.

달라지다

우리는 매일 달라질 수 있다.

똑같은 시간에 일어나고
똑같은 버스로 출근해도
우리의 생각은 매일 다르기 때문에
우리는 달라질 수 있다.

만약 우리가 하루를 아무 생각 없이 보낸다면
우리는 달라질 수 있는 소중한 기회를
그냥 흘려보내는 것이다.

우리는 매일 생각하고 매일 달라져야 한다.

바깥에

바깥에서 행복을 찾는다면
한겨울 북풍에 마음이 꽁꽁 얼어붙을 것이다.

행복이란
자신에게 주어진 삶을 충실히 살아가는 과정에서 느끼는 긍정적 감정들이다.

흔히 행복을 어떤 의도에 대한 결과물로 생각한다.
하지만 그렇게 얻은 감정들은 쉽게 사라지고,
순간 맛보았던 쾌락에 중독되어
더 큰 쾌락을 추가하는 악순환에 빠지게 된다.

이 악순환이 영원히 행복하지 못한 이유이고
행복을 바깥에서 찾는 실수를 저지르는 것이다.

행복은 바깥이 아니 내 안에 존재한다.

조금

내가 할 수 있는 것보다 조금만 더 나아가자!

근육을 키우기 위해서는
먼저 키우고자 하는 근육을 한계 점에 다다르도록 몰아붙여야 한다.
그리고 나서 하는 운동 한 두 번이 새로운 근육을 만들어 내는 것이다.
근육이 성장하듯 나의 인격을... 나의 능력을... 그리고 나의 꿈을...
내가 할 수 있는 한계까지 몰아붙인다.
그리고 그것보다 조금만 더 하는 것이다.
그렇게 난 성장해 간다.

내가 할 수 있는 것보다 조금만 더 나아가자!

하루만

신은 나에게 하루만 허락했다.

우리는 너무나 먼 미래를 걱정하며
현재를 소홀히 흘려보낸다.

그런데 어느 누가 장담하겠는가?
당신에게 내일이 올 것이라고...
지금 이 순간에도 교통사고로 심장마비로
그 외의 수 많은 이유로
내일을 보지 못하는 사람들이 있다.
그 사람 중에 당신이 포함되지 않을 것이라고
당신은 확신할 수 있겠는가?

결국 신은 당신에게 오늘 하루만 허락한 것이다.
아침에 눈을 뜨면 오늘 하루를 허락해준 신에게 감사하자!
그리고 열심히 살아가자!

우리에게 내일은 없다.

2018년 4월 15일 일요일

2018년 3월 25일 일요일

Jenkins Plugin 개발환경 구축

1) Maven 을 다운받아 환경변수로 Path 를 설정한다.

https://maven.apache.org/download.cgi 


2) [사용자이름]/.m2 폴더에 settings.xml 파일을 생성하고 아래내용을 추가한다.

    참조 : https://wiki.jenkins.io/display/JENKINS/Plugin+tutorial


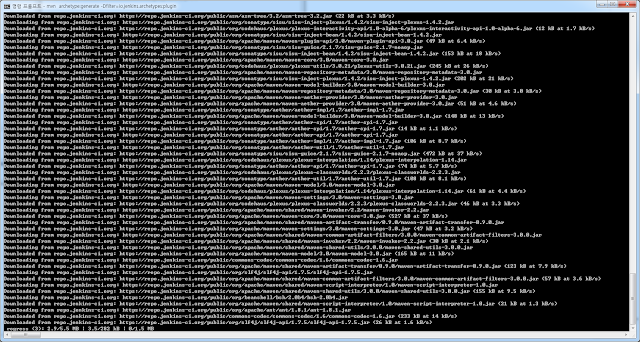
3) console 창에서 Jenkins Plugin 프로젝트 생성한다.
$> mvn -U org.jenkins-ci.tools:maven-hpi-plugin:create 또는
$> mvn archetype:generate -Dfilter=io.jenkins.archetypes:plugin
중간에 몇가지 선택하는 항목이 나타난다. Hello world 프로젝 타입으로 생성하면 Sample 코드가 포함된 프로젝트가 생성된다.


4) package 를 생성한다.
프로젝트 폴더(pom.xml 이 있는 위치)에서 아래 명령어를 실행하여 package 를 만든다.
$> cd com.kimssoft.jenkins
$> mvn package -Dmaven.test.skip=true


5) Eclipse 의 Maven project 로 converting 한다.
$> mvn -DdownloadSources=true -DdownloadJavadocs=true -DoutputDirectory=target/eclipse-classes eclipse:eclipse


6) Eclipse 프로젝트에서 Import 하여 개발한다.


7) maven package 명령어로 build 하여 Jenkins Plugin 파일을 생성한다.
$> mvn package -Dmaven.test.skip=true


8) project 폴더의 target 에 있는 hpi 파일을 Jenkins 에 올려서 테스트 진행한다.


2018년 2월 6일 화요일

Ajax cross domain 처리 - Android Phonegap

Andorid 프로젝트에서 다음 명령을 사용하여 whitelist plugin 을 추가한다.

----------------------------------------------------------------------------------------------
> cordova plugin add cordova-plugin-whitelist
Fetching plugin "cordova-plugin-whitelist" via npm
Installing "cordova-plugin-whitelist" for android

               This plugin is only applicable for versions of cordova-android gr
eater than 4.0. If you have a previous platform version, you do *not* need this
plugin since the whitelist will be built in.


> cordova prepare

----------------------------------------------------------------------------------------------


만약 아래와 같은 라는 메시지가 출력되면 Android 프로젝트의 폴더 구조가 달라서 발생하는 에러이다.
www 폴더등을 지웠다면 폴더를 다시 생성해야 plugin 을 설치할 수 있다.

----------------------------------------------------------------------------------------------
> cordova plugin add cordova-plugin-whitelist
Current working directory is not a Cordova-based project.

----------------------------------------------------------------------------------------------

2018년 2월 4일 일요일

Fail to load dx.jar 메시지 출력시 - Android Phonegap

에러 메시지 :

Error:Android Dex: [classes.jar] Failed to load dx.jar
Error:Android Dex: [classes.jar] java.lang.ClassNotFoundException: com.android.dx.command.DxConsole
Error:Android Dex: [classes.jar] at java.net.URLClassLoader.findClass(URLClassLoader.java:381)
Error:Android Dex: [classes.jar] at java.lang.ClassLoader.loadClass(ClassLoader.java:424)
Error:Android Dex: [classes.jar] at java.lang.ClassLoader.loadClass(ClassLoader.java:357)
Error:Android Dex: [classes.jar] at org.jetbrains.android.compiler.tools.AndroidDxRunner.loadDex(AndroidDxRunner.java:80)
Error:Android Dex: [classes.jar] at org.jetbrains.android.compiler.tools.AndroidDxRunner.runDex(AndroidDxRunner.java:136)
Error:Android Dex: [classes.jar] at org.jetbrains.android.compiler.tools.AndroidDxRunner.main(AndroidDxRunner.java:336)
Error:Android Dex: [classes.jar] Exception in thread "main" java.lang.NullPointerException
Error:Android Dex: [classes.jar] at org.jetbrains.android.compiler.tools.AndroidDxRunner.runDex(AndroidDxRunner.java:139)


해결책 : android SDK Build-Tools 의 버젼을 25.0.3 버젼을 사용한다.

Tools -> Android -> SDK Manager -> SDK Tools tab -> check "Show package details"


2018년 2월 2일 금요일

Phonegap 으로 Android 프로젝트 생성 - windows 환경

1) 아래 링크에서 다운받아 JDK 를 설치한다.
    http://www.oracle.com/technetwork/java/javase/downloads/index.html

2) 아래 링크의 프로그램을 다운받아 Node JS 를 설치한다.
    https://nodejs.org/en/

3) 아래 링크에서 binary 파일을 다운받아 Apache Ant 를 설치한다.
    http://ant.apache.org/bindownload.cgi

4) 아래 링크에서 Android Studio 를 설치한다.
    https://developer.android.com/studio/index.html
    이전버젼 : https://developer.android.com/studio/archive.html

5) Android Studio 를 실행하여 필요한 SDK 를 설치한다.
    Tools -> Android -> SDK Manager


6) 환경변수를 잡아준다.
  • JAVA_HOME 설정
       ex) C:\Program Files\Java\jdk1.8.0_60

  • ANT_HOME 설정
       ex) D:\DevTools\apache-ant-1.9.6-bin\apache-ant-1.9.6

  • PATH 설정
       Java : ex) %JAVA_HOME%\bin;
       Android SDK : ex) D:\DevTools\android-sdk\platform-tools;
                               D:\DevTools\android-sdk\tools;

       Node JS : ex) C:\Program Files\nodejs\;
       Apache Ant :  ex) D:\DevTools\apache-ant-1.9.6-bin\apache-ant-1.9.6\bin;
     

7) Phonegap 설치
   window 의 Command 창에서 아래 명령어로 Phonegap 을 설치한다.
   npm install -g phonegap


8) Phonegap 프로젝트 생성
   phonegap create [생성할 폴더] [Package 명] [프로젝트명]
   D:> phonegap create ./MobileWinusApp com.logisall.mobilewinus MobileWinus


9) 생성된 프로젝트에 Android Library 추가
   cordova platform add android


10) Android Studio 를 띄워서 Project 를 Import 한다.
     File -> New -> Import Project